March 2019
wood+resin shifter
Quick note: for the sake of clarity, I've amended the wording and tone of the original writeup I did for this. Thanks! - August 2021
I recently saw a cool video on some maker's YouTube channel of a simple wood+resin pour project. There are plenty of similar craft videos out there, but I like this guy. The idea is, you use some method to snap a piece of wood -- if you do it right, and with a bit of luck, you can end up with a really cool, jagged edge where the wood grain splits in half. Wrapping the piece in packaging tape creates a pretty functional mould -- pour resin into the mould, wait for it to harden, and you end up with a cool, fused piece of wood and resin to shape into some final form, while showcasing and preserving the jagged endgrain of the wood. I saw people using this technique for rings, pendants, and even tabletops, and decided to give it a try.
I made a couple decorative test pieces, with no real end product in mind; I just wanted to test out the technique. It was then that I hit upon an idea for a grander project: a new shift knob for my car.
I started ideating with pen and paper, sketching out ideas that might work. Ultimately, I decided to create an elongated, gemstone-like shape with multiple facets; I thought this would be unique and pair well with the glossy resin.
 The first thing to do, once I had a design that I liked: get a decent-sized chunk of interesting wood (big enough to cut down to an approximately
knob-sized diameter), and break it in half. This actually gave me a bit of trouble: with my smaller tests, I had used a vise to apply pressure at three points, snapping
the thinner pieces in a pretty predictable location and manner.
That technique certainly wasn't possibly with this big chunk of wood-- way too big for my non-massive vise.
The first thing to do, once I had a design that I liked: get a decent-sized chunk of interesting wood (big enough to cut down to an approximately
knob-sized diameter), and break it in half. This actually gave me a bit of trouble: with my smaller tests, I had used a vise to apply pressure at three points, snapping
the thinner pieces in a pretty predictable location and manner.
That technique certainly wasn't possibly with this big chunk of wood-- way too big for my non-massive vise.
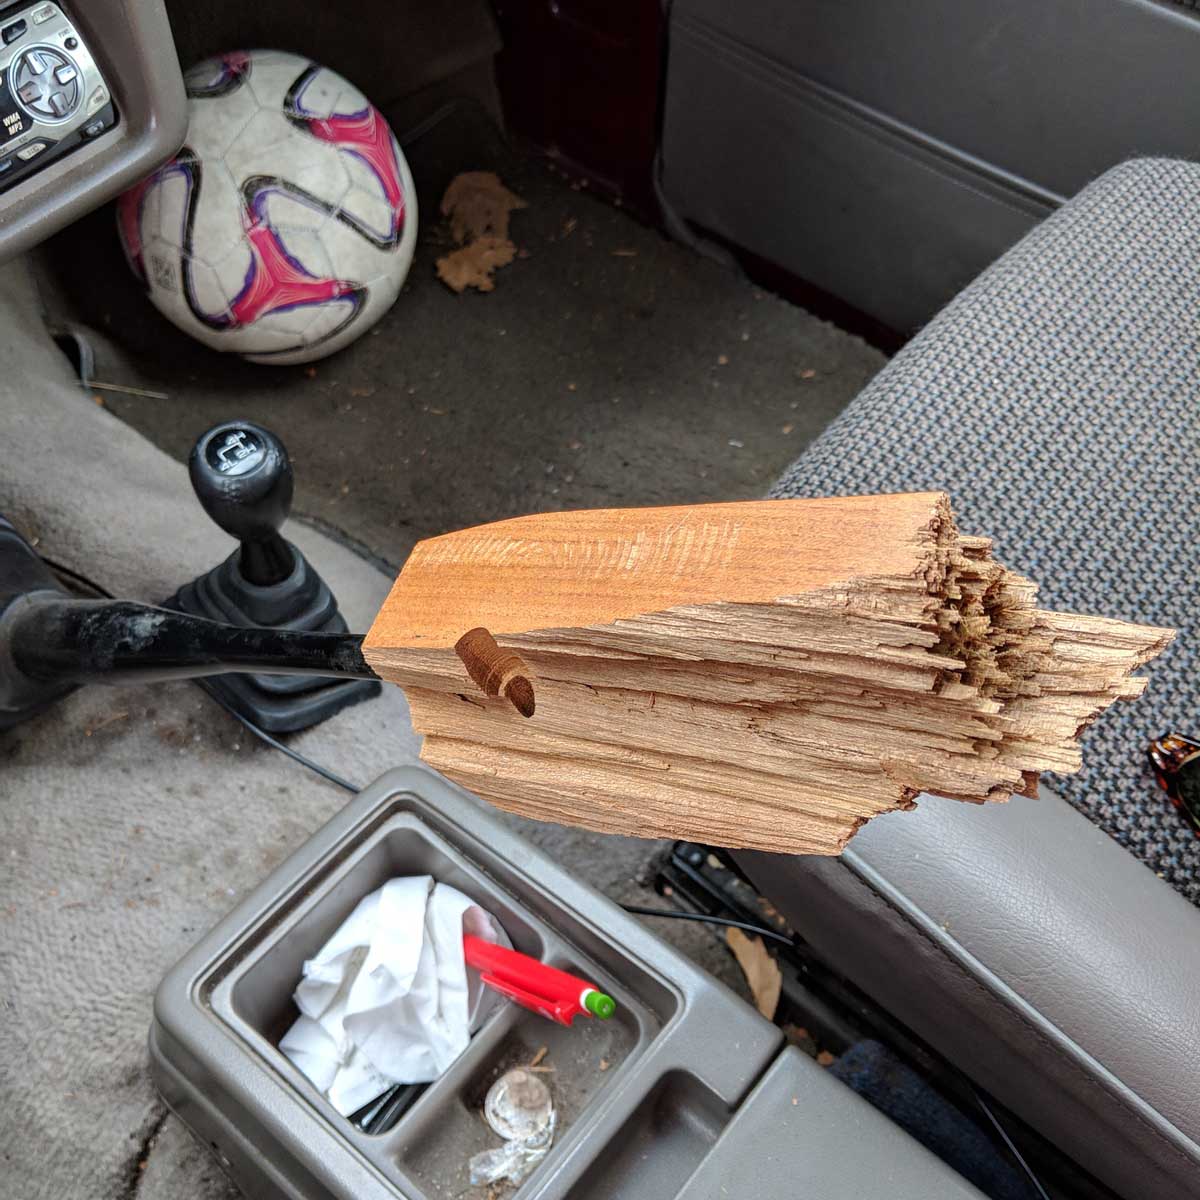
My next idea was a bit more "caveman-style" -- prop it up on a couple rocks in my backyard and smash a sledgehammer clean through it (with safety glasses and all the relevant PPE, of course). This technique did work eventually, although I did shatter a couple rocks and drive another deep into my lawn before I split the wood. Just for fun, I decided to drill a hole in the bottom and give it a test fit in the car. And no, I didn't drive it like this.
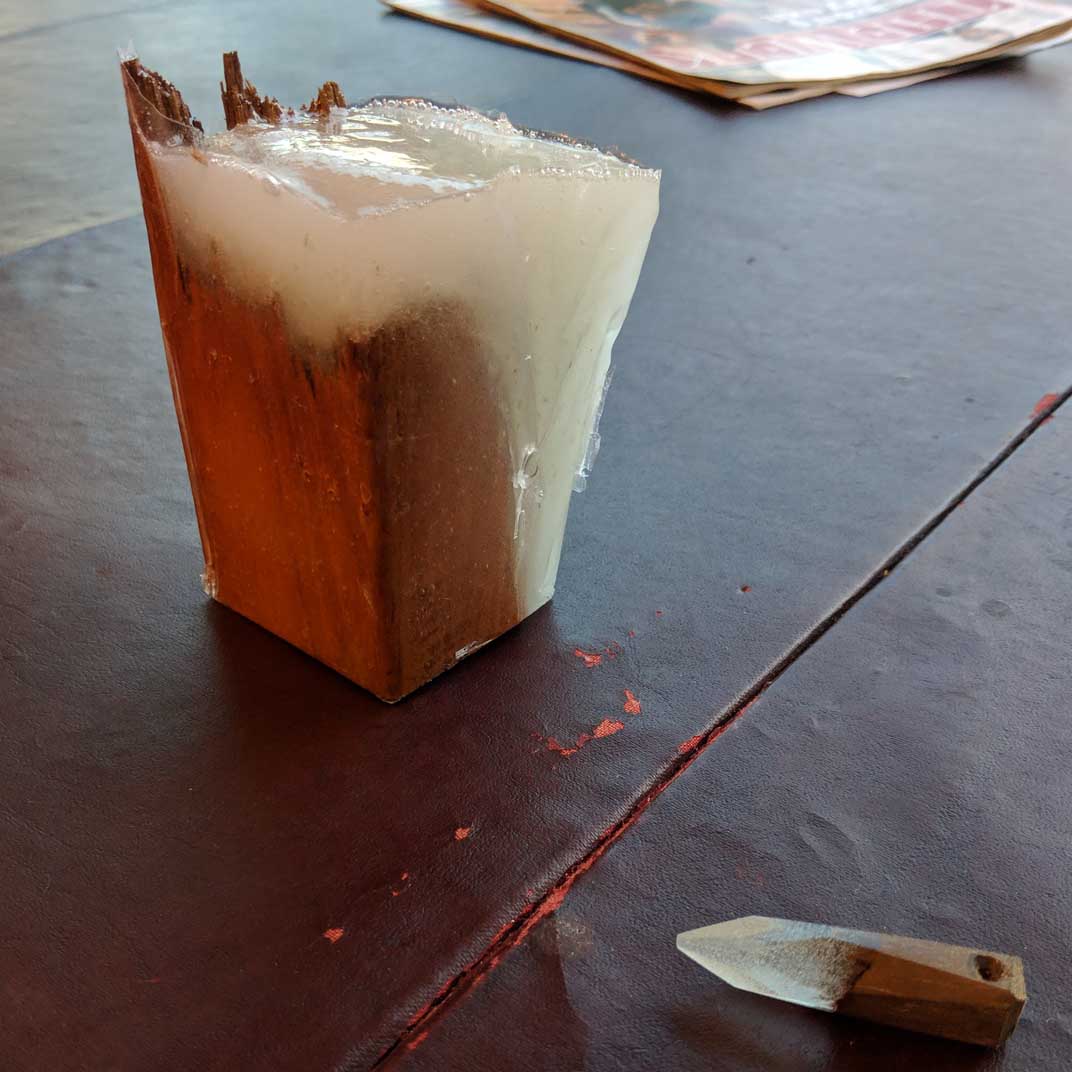 After the initial test installation, it was time to get the other half of the material attached. I trimmed down some excess length on
the bottom, and mixed up the craft resin (a simple 1:1 ratio + some glow-in-the-dark colorant, just for fun). 24 hours later, the resin was hardened and it was just about
time to start shaping the final piece. One consideration that gave me some trouble was the bubble issue. Typically, there is a lot of air trapped in wood grain, which in a
project like this, can stream up and solidify into permanent bubbles as the resin is hardening. Often, you see people addressing this with pressure or heat -- they'll put the
wood+resin piece in a pressure pot as the resin hardens, which will force the bubbles out. Or, if it is too large, they'll shoot a heat gun at the surface to try to accomplish
the same thing. I didn't have easy access to either of these things, so before pouring the resin, I hit the wood grain with a couple coats of clearcoat, in an effort to seal in the air.
It was a mixed success -- I did still end up with some bubbles, but I don't think they take away from the final product much.
After the initial test installation, it was time to get the other half of the material attached. I trimmed down some excess length on
the bottom, and mixed up the craft resin (a simple 1:1 ratio + some glow-in-the-dark colorant, just for fun). 24 hours later, the resin was hardened and it was just about
time to start shaping the final piece. One consideration that gave me some trouble was the bubble issue. Typically, there is a lot of air trapped in wood grain, which in a
project like this, can stream up and solidify into permanent bubbles as the resin is hardening. Often, you see people addressing this with pressure or heat -- they'll put the
wood+resin piece in a pressure pot as the resin hardens, which will force the bubbles out. Or, if it is too large, they'll shoot a heat gun at the surface to try to accomplish
the same thing. I didn't have easy access to either of these things, so before pouring the resin, I hit the wood grain with a couple coats of clearcoat, in an effort to seal in the air.
It was a mixed success -- I did still end up with some bubbles, but I don't think they take away from the final product much.
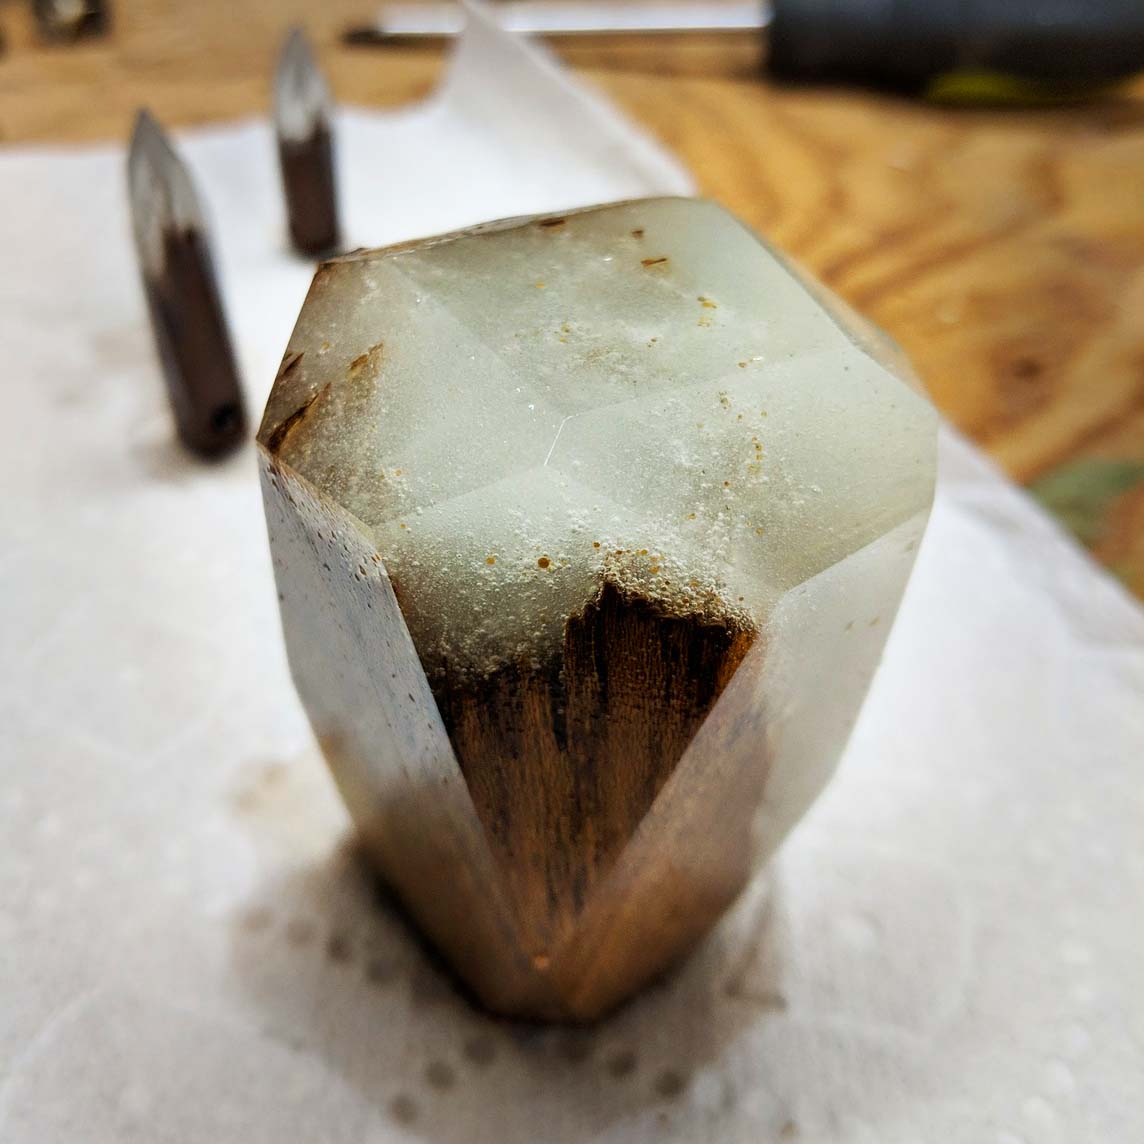
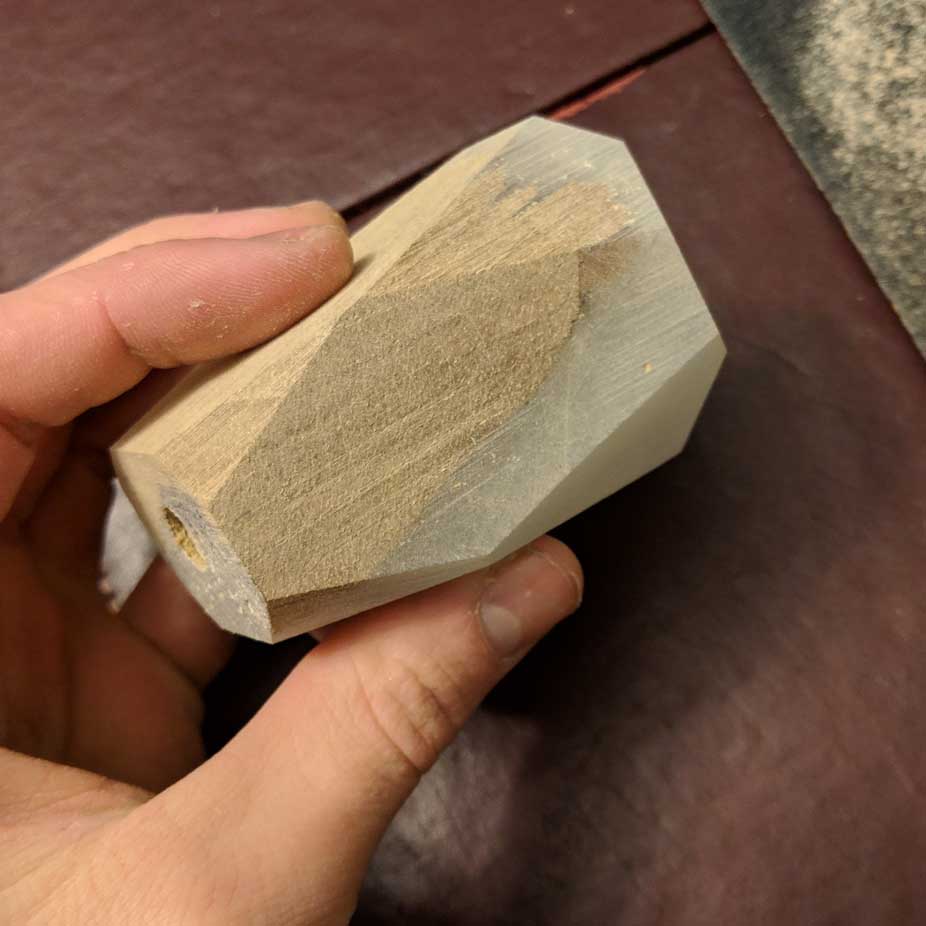 After making some rough cuts to trim down my workpiece, it was on to sanding. So much sanding. The belt sander makes short work of wood and resin alike; pictured is the
knob after roughing out the facets. Making flat faces, rather than a contoured form, makes it easier to control the next step: hand sanding. Working each face up through
finer and finer grit sandpaper all the way to 2000-grit, I got the silky-smooth product I was looking for.
After making some rough cuts to trim down my workpiece, it was on to sanding. So much sanding. The belt sander makes short work of wood and resin alike; pictured is the
knob after roughing out the facets. Making flat faces, rather than a contoured form, makes it easier to control the next step: hand sanding. Working each face up through
finer and finer grit sandpaper all the way to 2000-grit, I got the silky-smooth product I was looking for.
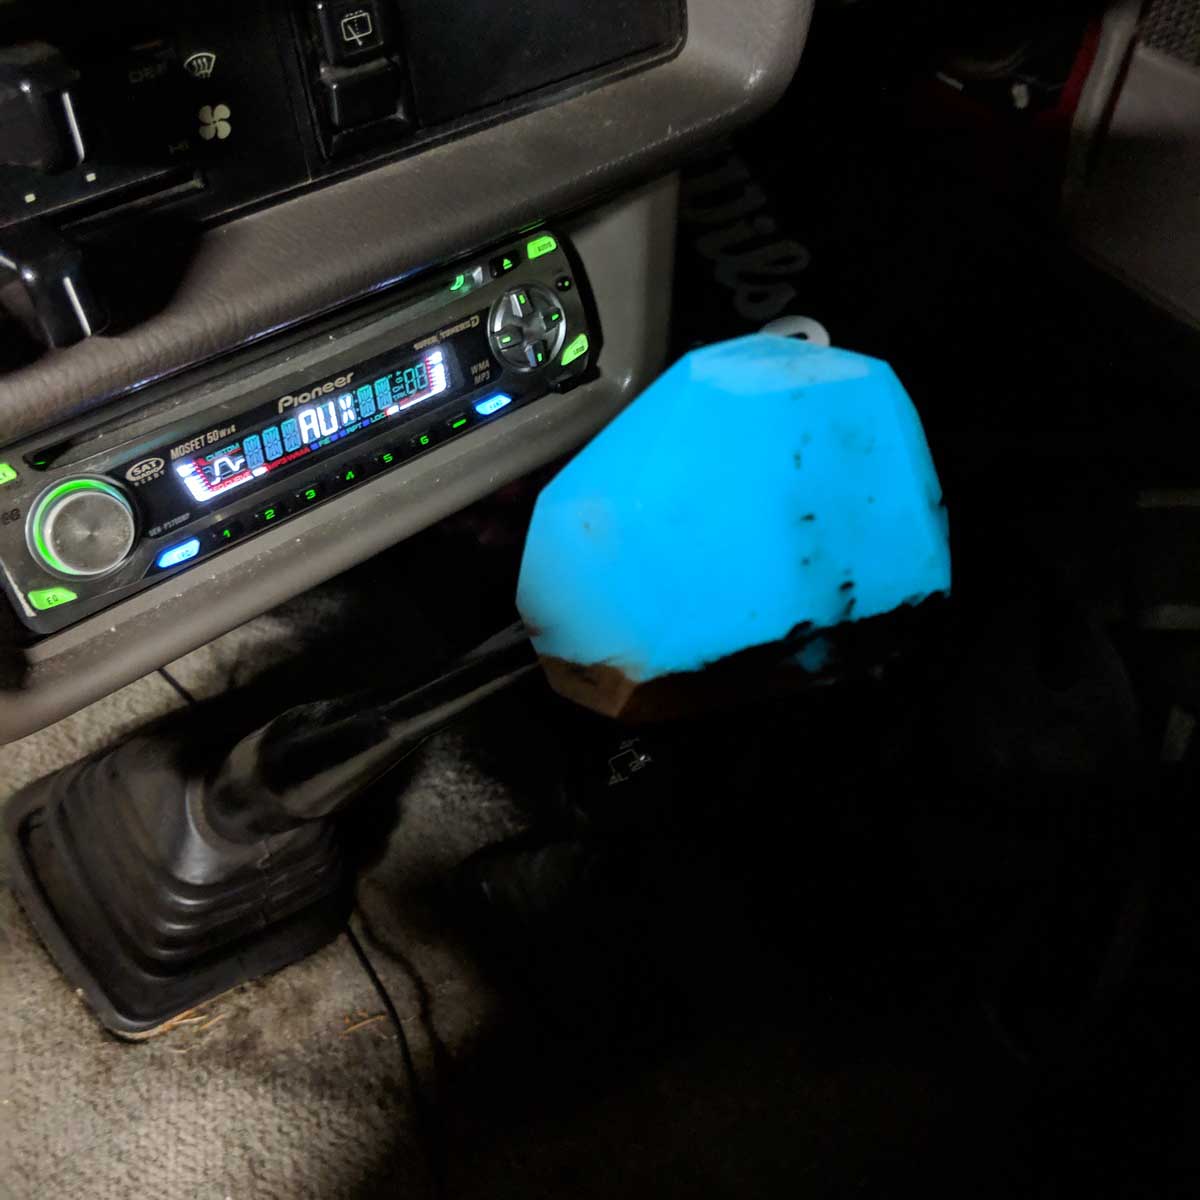
 Finally, after a couple layers of polyurethane to seal everything in, plus some polishing, and it was ready for final install.
I take away a lot of positives from this, and learned a lot, but there are a few things I would differently next time. First and foremost: although each facet is silky smooth,
the form as a whole doesn't feel that great to use, with sharp edges and points abound. In my zeal to make something that looks cool, I forgot about ergonomics. I neglected
one of the most important aspects of designing anything, the needs of the end user, which is especially impressive since I am the end user! Anyway, lessons learned to apply to my
next manipulated project.
Finally, after a couple layers of polyurethane to seal everything in, plus some polishing, and it was ready for final install.
I take away a lot of positives from this, and learned a lot, but there are a few things I would differently next time. First and foremost: although each facet is silky smooth,
the form as a whole doesn't feel that great to use, with sharp edges and points abound. In my zeal to make something that looks cool, I forgot about ergonomics. I neglected
one of the most important aspects of designing anything, the needs of the end user, which is especially impressive since I am the end user! Anyway, lessons learned to apply to my
next manipulated project.