December 2018
3D catan set
Note: this is Part 1 of my 3D printed Catan project: Part 2 can be found here, and Part 3 can be found here.
I think it’s fitting for this to be the first project on display. When I dreamed of getting a 3D printer in college, it was because I wanted to do this project -- I think I stumbled across someone’s custom Catan board in 2010 or so, and for years, I knew I wanted to create my own version in a way that I hadn’t seen anyone else do, and yet I didn’t have the ability to make it happen yet. I wanted to design and create my own gameboard, painting the pieces to look like realistic, miniature terrain -- I had seen simplistic, stylized versions, but nothing approaching the vision that I had in my head and was confident I could reproduce.
Now, in 2015 and 2016 I began actually interacting with and learning how to use the 3D printers at my university makerspace. And yet it wasn’t until I got one of my own, in 2017, that the dream of my Catan project resurfaced. Coincidentally, this was also around the same time that I began learning how to use the modelling/ rendering program Blender. While I had picked up both Blender and the 3D printer ostensibly for work purposes, I quickly adapted them to my personal project.
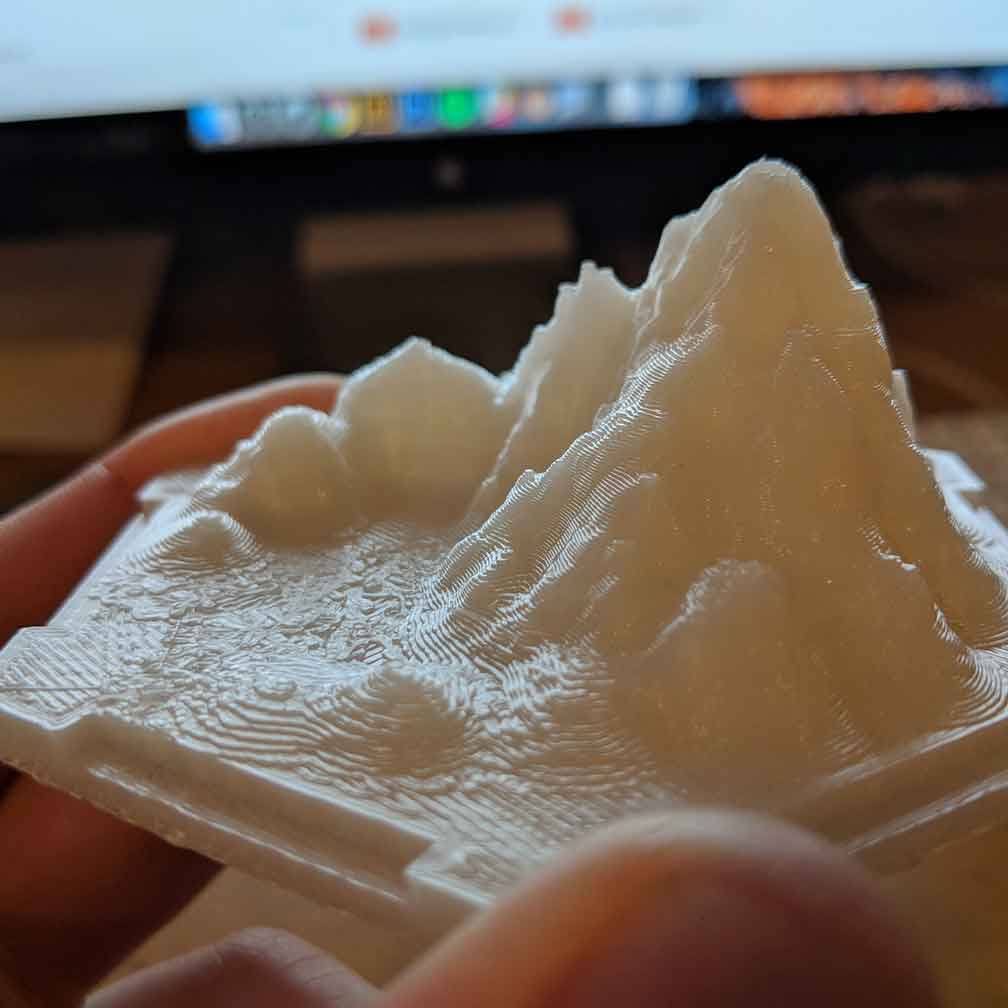
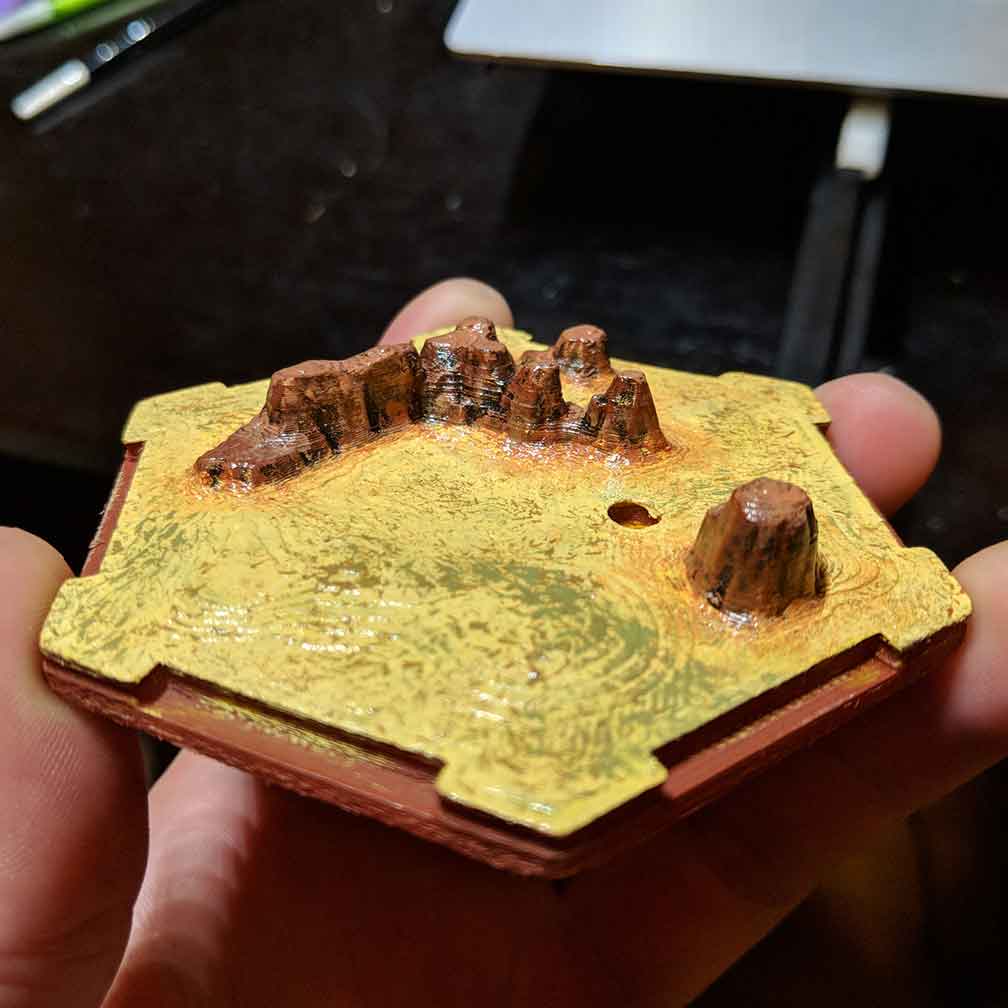
 Diving right in, I worked out a base model for the hexagonal game
pieces that I was going to use, with indentations for the “road” tokens, and started trying to model a mountain on top of it. Immediately, I ran into problems trying to
squeeze all the detail and features into the tile, while leaving enough room for the necessary bits like road edges and magnets to be mounted into each tile.
Diving right in, I worked out a base model for the hexagonal game
pieces that I was going to use, with indentations for the “road” tokens, and started trying to model a mountain on top of it. Immediately, I ran into problems trying to
squeeze all the detail and features into the tile, while leaving enough room for the necessary bits like road edges and magnets to be mounted into each tile.
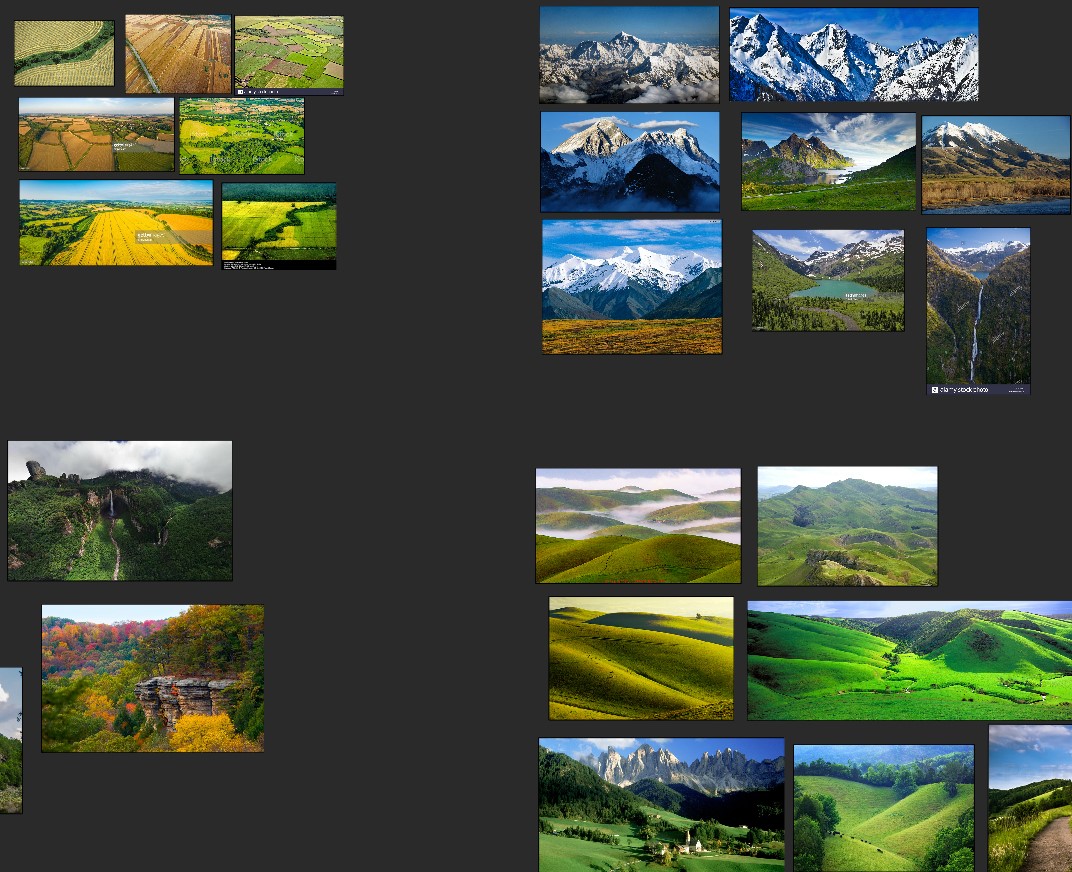 As I was
struggling with this, I went to the internet and began loading up on reference images -- not just for mountains, but for fields, hills, quarries, and the other elements
that I would include on future tiles. Using these, I worked out a design that looked okay on my screen, loaded it up on the printer, and a few hours later, I had the thing
in my hand. This never gets old for me -- turning something that exists only theoretically on a computer screen, into something real and tangible.
As I was
struggling with this, I went to the internet and began loading up on reference images -- not just for mountains, but for fields, hills, quarries, and the other elements
that I would include on future tiles. Using these, I worked out a design that looked okay on my screen, loaded it up on the printer, and a few hours later, I had the thing
in my hand. This never gets old for me -- turning something that exists only theoretically on a computer screen, into something real and tangible.
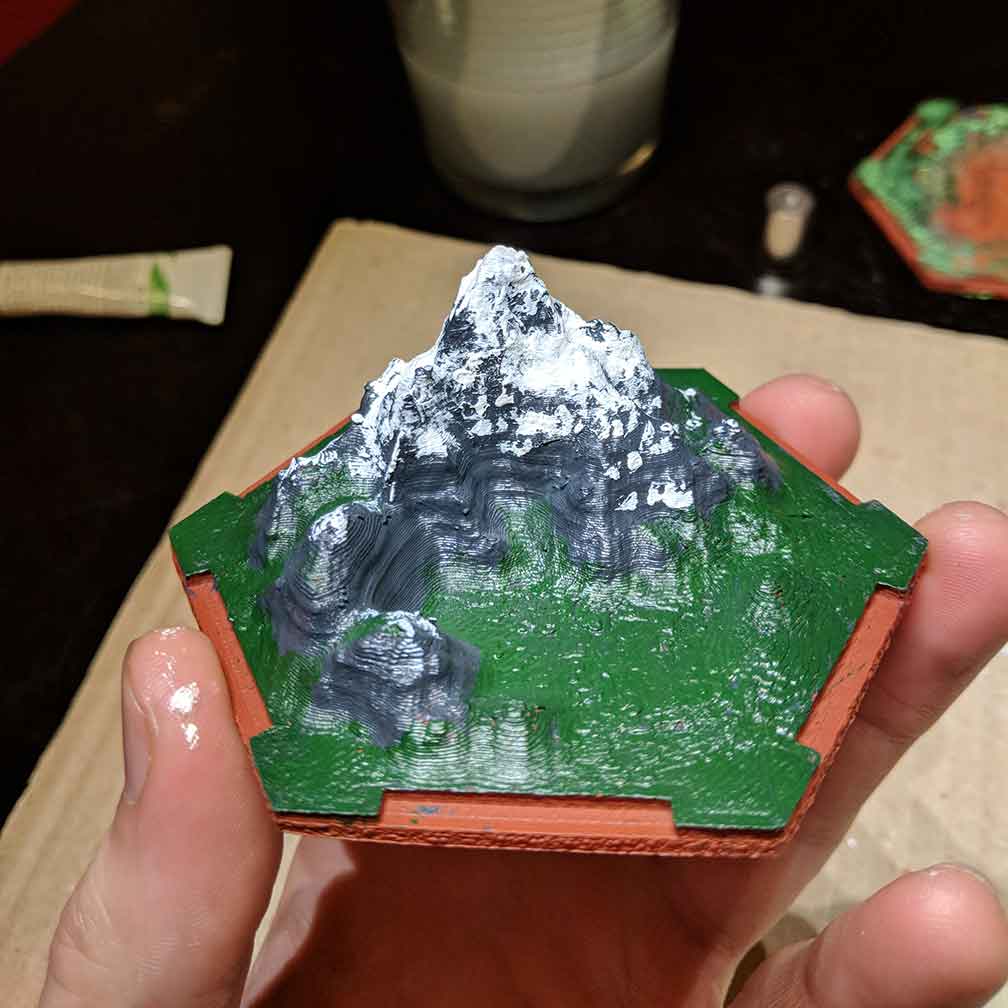
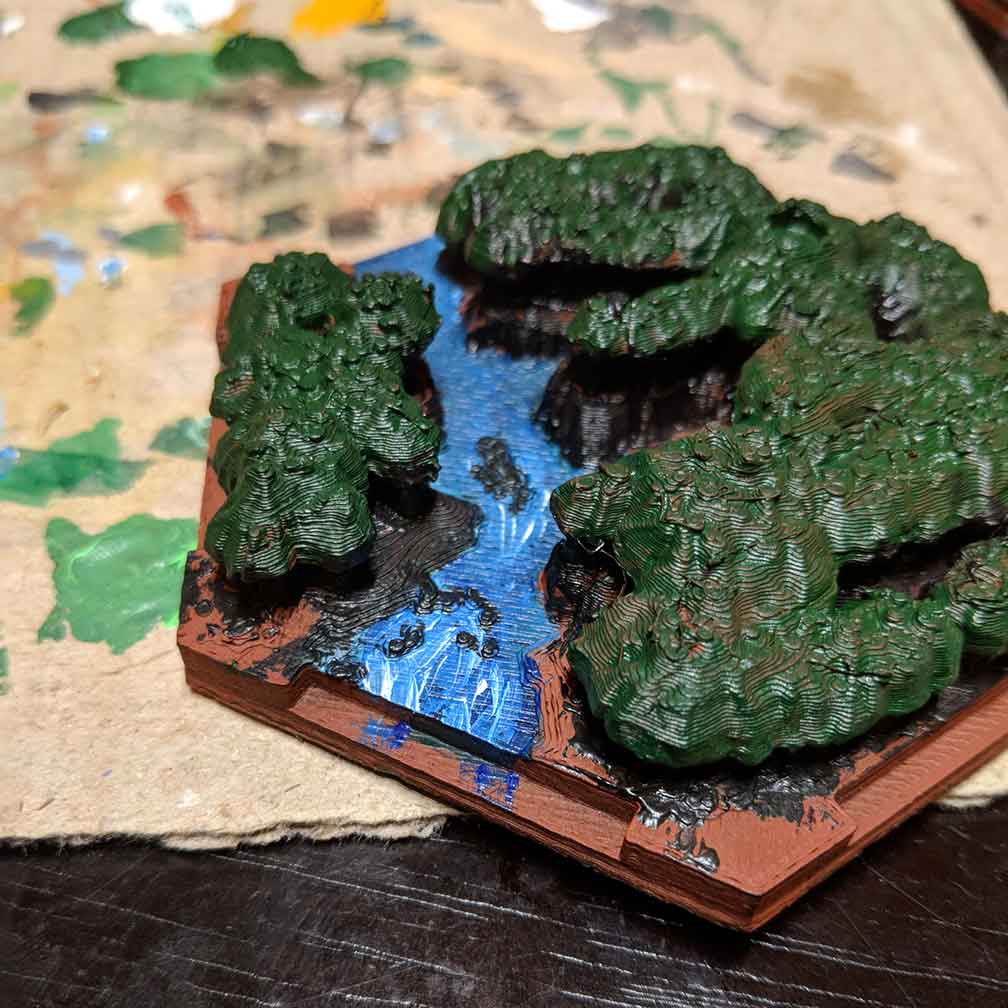
The mountain looked surprisingly good for a first attempt, so I went ahead and began painting it. I put down a dark grey base, and started experimenting with
layering other colors on top of it; green lowlands, other greys for contrast, and white snowy peaks. All told, it turned out well enough for a first try!
Looking back, something very striking to me is how, with
this project, I was developing so many skills at the same time. I was new to Blender modelling (and working with organic, miniature shapes), new to owning,
operating, and troubleshooting a 3D printer (there was and is SO much troubleshooting), and new to painting of almost any kind. Luckily, there are fantastic
and bounteous resources for all these things on the internet, and I was able to watch, practice and learn at a terrific rate.
 In fact, since I did the project
largely in chunks -- modelling, printing, and painting one or two pieces at a time -- it’s always pretty apparent to me which pieces came first and which came last:
all these skills, but especially my painting techniques, improved drastically as I worked on the project.
In fact, since I did the project
largely in chunks -- modelling, printing, and painting one or two pieces at a time -- it’s always pretty apparent to me which pieces came first and which came last:
all these skills, but especially my painting techniques, improved drastically as I worked on the project.
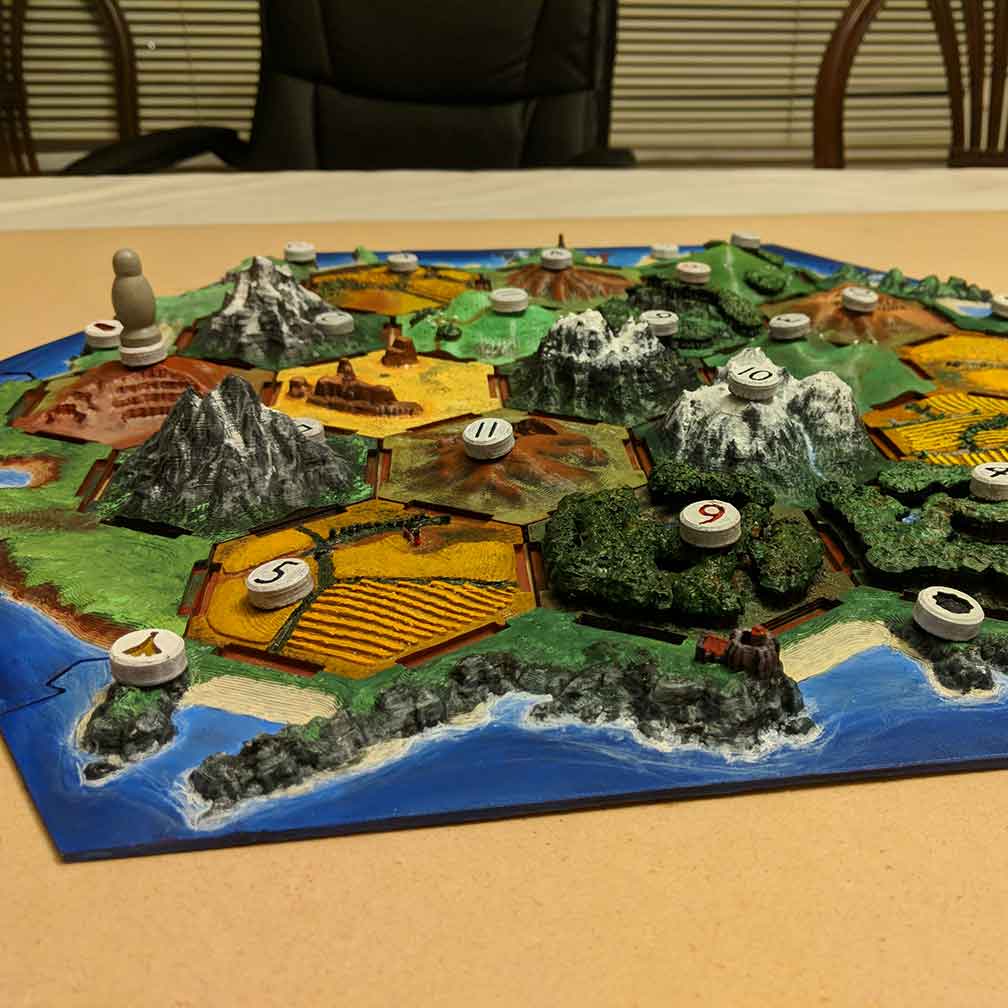
 Anyhow, once I had the first mountain under my belt and worked out the system for how I was going to produce them,
I went on a tear, soon producing all the interior tiles and associated tokens. Lastly came the long, coastal tiles. These incorporated an interlocking system
at each edge, to keep the whole board together, but were otherwise just slightly larger tiles than the ones I had already produced. At this point, not much was
left to do, but step back, marvel, and get a game going!
Anyhow, once I had the first mountain under my belt and worked out the system for how I was going to produce them,
I went on a tear, soon producing all the interior tiles and associated tokens. Lastly came the long, coastal tiles. These incorporated an interlocking system
at each edge, to keep the whole board together, but were otherwise just slightly larger tiles than the ones I had already produced. At this point, not much was
left to do, but step back, marvel, and get a game going!